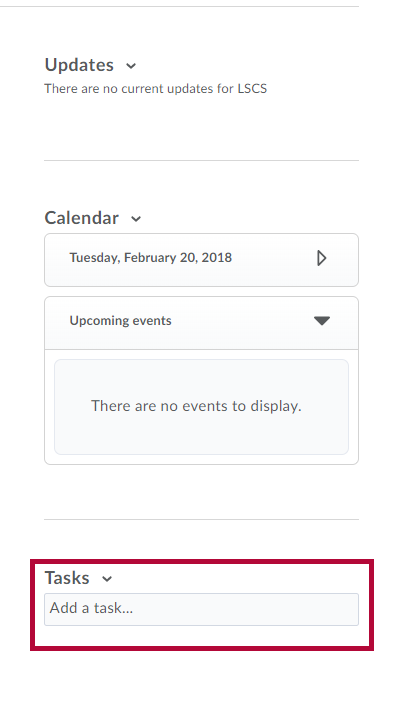
Tasks can help to keep course events distinct from your personal tasks. Use Tasks to break up a big assignment into sub-tasks to stay on top of all your due dates. Tasks is located on the right side of your D2L course or home page in the Calendar area.
Create Tasks
- On the D2L homepage or the start page of your course, find Tasks on the right side of the page below the Calendar. Click once on [Add a task] and type in a short task name. When you press enter or click the mouse outside the Tasks box the task is saved automatically and displays with a checkbox and drop-down arrow.
- Click the checkbox to mark the task as completed or use the arrow to add notes, a due date or delete the task.
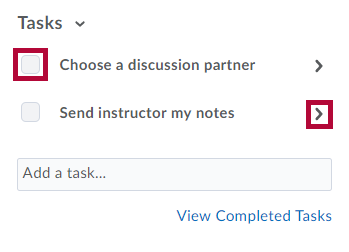
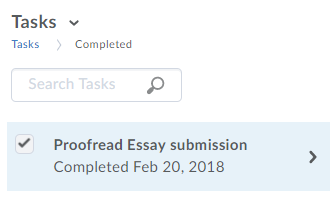
- Use the [View Completed Tasks] link to review or delete tasks that have been completed.


Adding Task Details
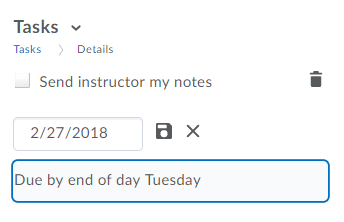
- Click the task name to show task details.
- If your task does not have a due date, click directly on the [Due date] field to bring up a date selector, then select a due date, and click the [Save due date] icon.
- Click on the [Add a note...] field to add explanatory notes to your task. Click outside the text field to save your note.

Mark a Task Complete
- Select the check box beside the task name in the task pane. The task disappears from view, but remains in your searchable task archive.
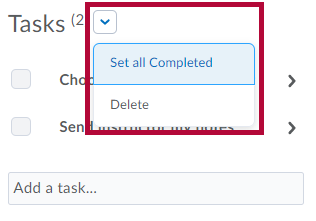
Marking All Tasks Complete
- Select [Set all Completed] from the Tasks context menu.

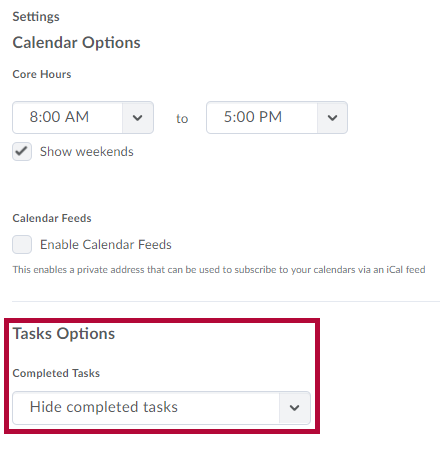
NOTE: Tasks will only disappear when you mark them completed if you select [Hide Completed Tasks] in the drop-down list under Completed Tasks in Settings.