Your instructor may offer the option to sign up for specific time slots for Microsoft Bookings meetings for office hours, testing, meetings, or other individual sessions. You will need to sign up for a slot if this is the case.
NOTE: Please use your LSC Student Email (LSCusername@my.lonestar.edu) to reserve an appointment using Microsoft Bookings.
To Book an Appointment
- Open the Microsoft Bookings link provided by your instructor. Microsoft Bookings will schedule an appointment through Microsoft Teams.
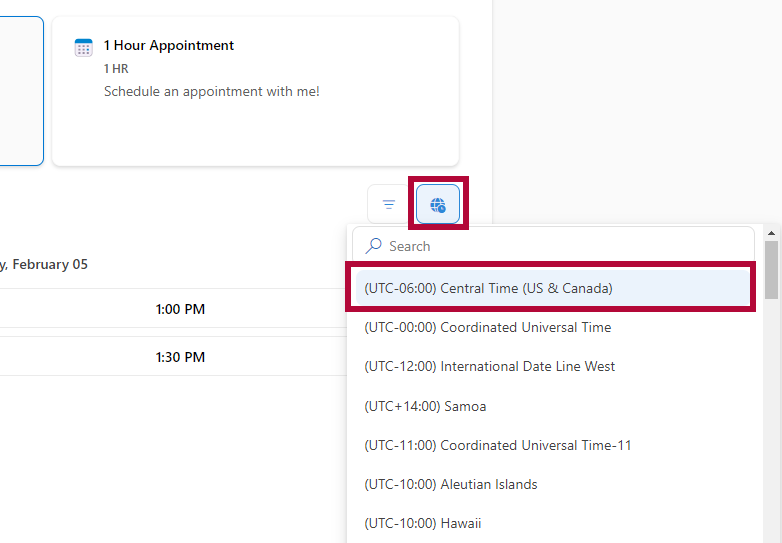
- Click on the [Globe icon] to select your time zone.
NOTE: If you do not set your time zone, you might schedule an appointment at the incorrect time.

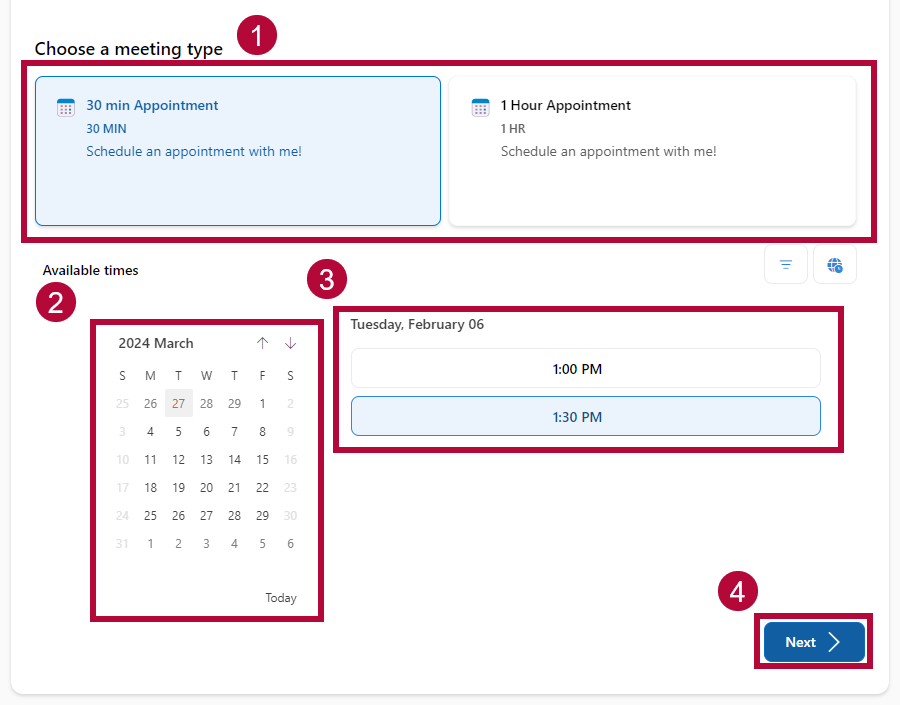
- Choose a Meeting Type to see available dates, select a date and time, and then click [Next].
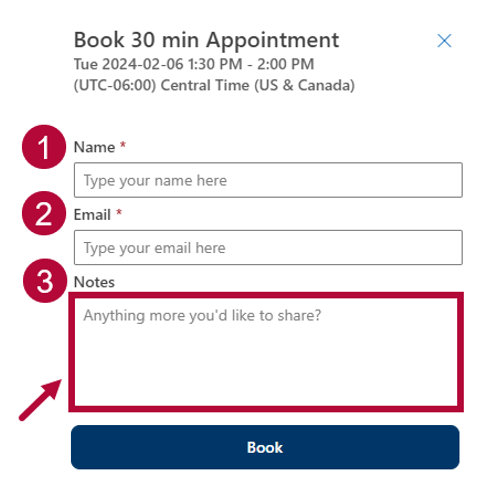
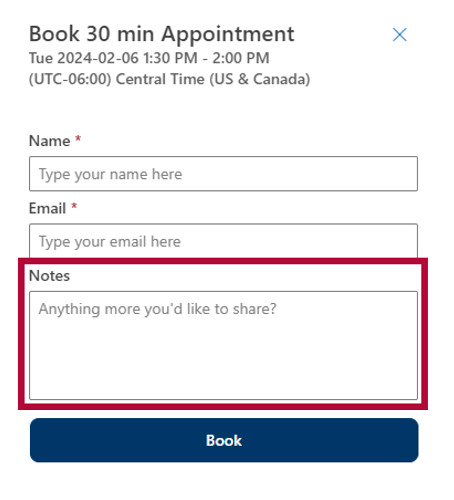
- Enter your Name, Email, and any Notes to let your instructor know what you would like to discuss during your appointment. Click [Book] when completed.
NOTE: It's strongly recommended to include the reason for your appointment within the Notes textbox. By doing so, your instructor can be better prepared for your scheduled appointment.
- Immediately, you will receive two emails to your Outlook inbox:
- Outlook Calendar invite
- Bookings Confirmation
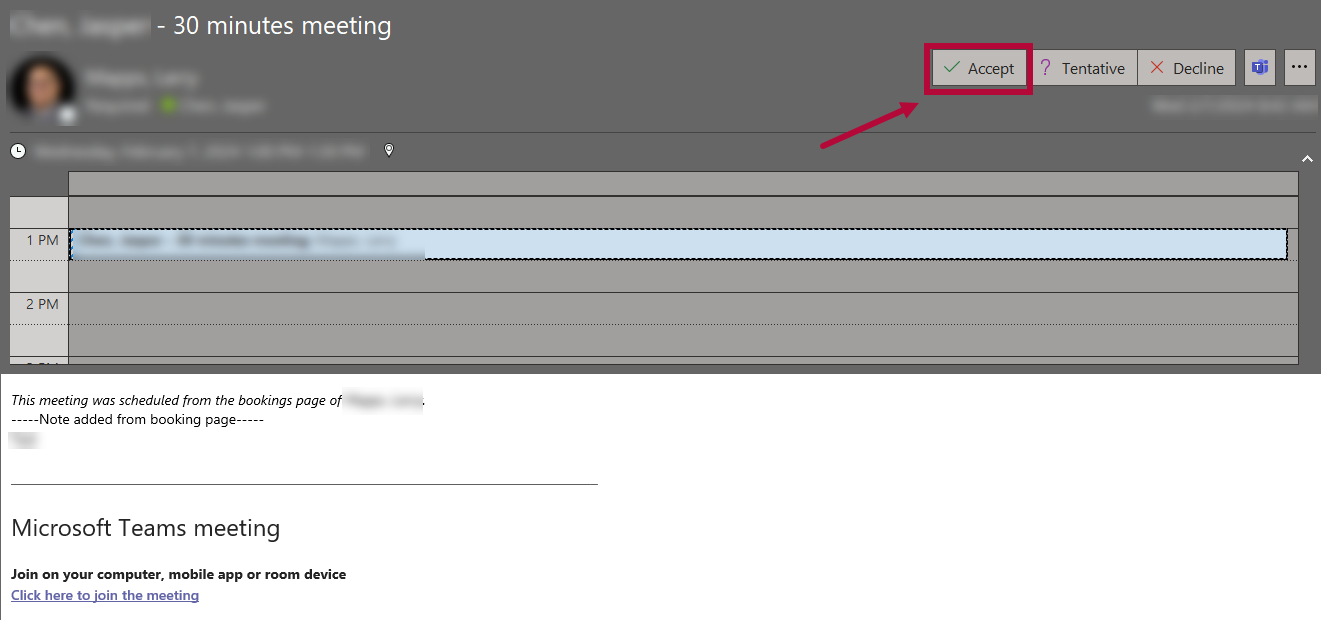
- Open the Outlook Calendar invite sent to your Outlook email inbox and click on [Accept]. This will add the meeting to your Outlook calendar.
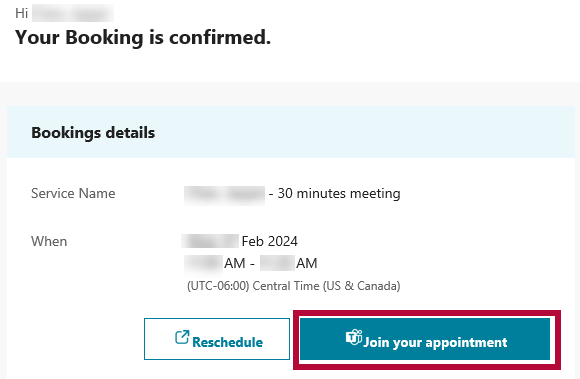
- Next, open the Bookings Confirmation email, click on [Join your appointment].
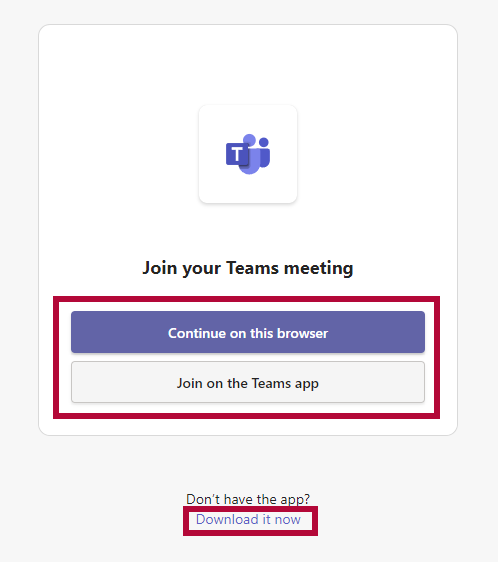
On the Join your Teams meeting page, you can elect to click on [Continue on this browser] to use the browser version of Microsoft Teams, or join using the Microsoft Teams app. If you do not have the Microsoft Teams app installed on your computer, be sure to click on [Download it now] on the following popup window.


To Reschedule an Appointment
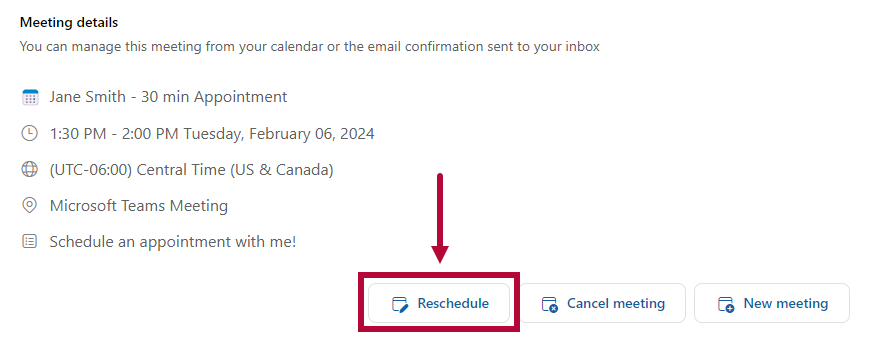
- Open your confirmation email and click [Manage meeting].

- In the new tab, click [Reschedule].
- Select the meeting type, date, and time for your new meeting and click [Update].
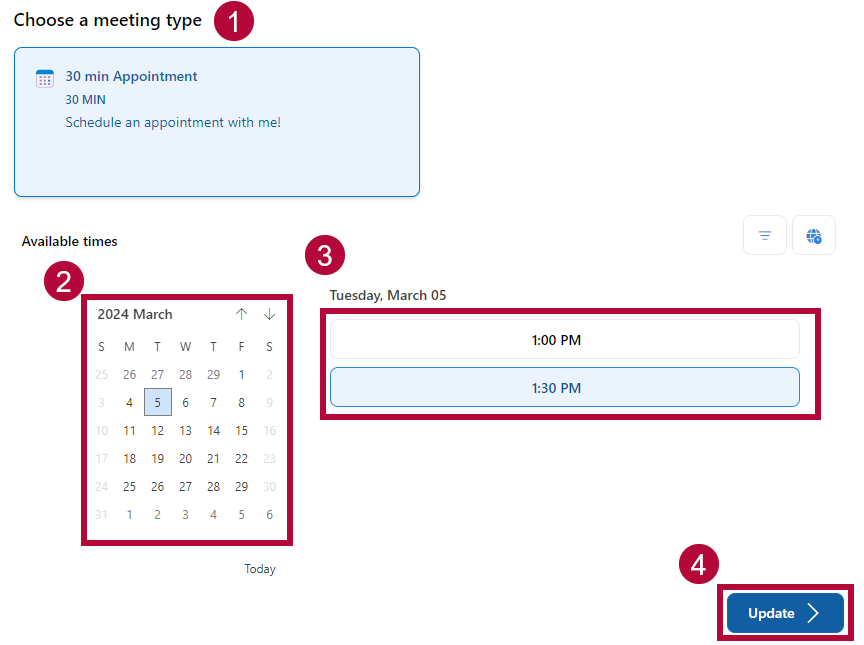
- Edit the notes if you need to and then click [Update].
- You will receive a new confirmation email with the updated time.


To Cancel an Appointment
- Open your confirmation email and click [Manage meeting].

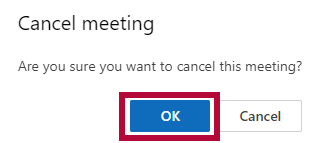
- In the new tab, click [Cancel meeting].

- Click [OK].
- You will receive a confirmation email with the updated time.


