Read&Write is a browser tool designed to assist users with various reading and writing tasks. It typically offers features such as text-to-speech functionality, word prediction, dictionary lookup, highlighting tools, and voice recognition. Students can utilize these features to improve their reading comprehension, writing proficiency, and overall accessibility while browsing the web.
Installing the Read&Write Chrome Extension
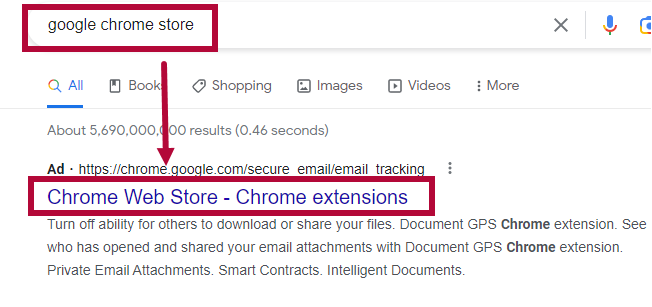
- While in the Chrome browser, head to the Chrome Web Store. You can just Google Chrome Web Store and it should be the first result.
- Alternatively you could also click on the [Three dot] menu at the upper-right corner of the browser. Within the drop-down menu, click [Extensions] → [Visit Chrome Web Store].
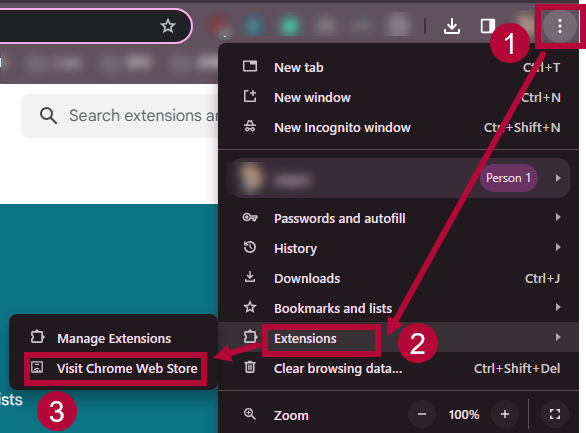
- Alternatively you could also click on the [Three dot] menu at the upper-right corner of the browser. Within the drop-down menu, click [Extensions] → [Visit Chrome Web Store].
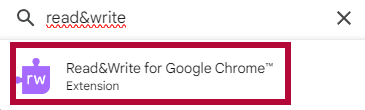
- Within the Chrome Web Store, look for the [Search extensions and themes] search bar in the upper-right corner of the page.

- Search the words Read&Write. Select [Read&Write for Google Chrome] from the results.
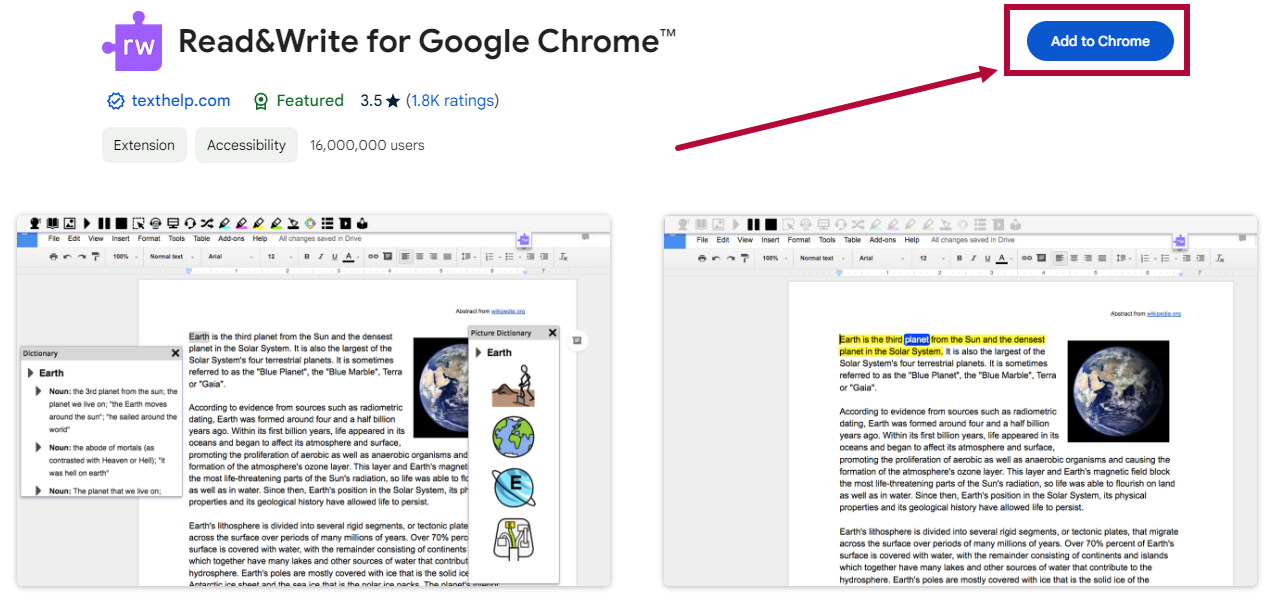
- Click [Add to Chrome].
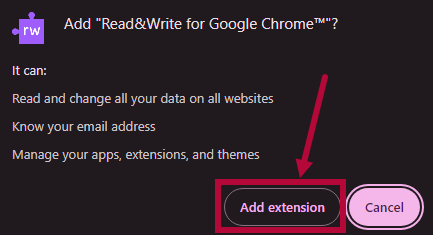
- On the popup window, click [Add extension].
- You are all set! Read&Write is now added to your Chrome browser as a Chrome extension.
You can pin the Read&Write extension to your taskbar by clicking on the [Puzzle piece] icon → [Pin] icon.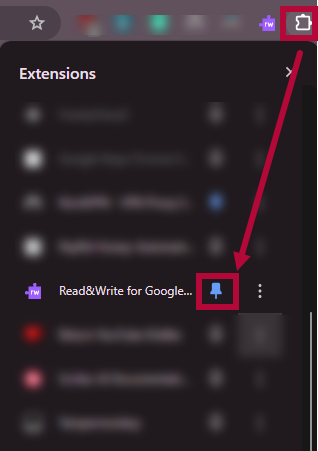


Set Up the Read&Write Chrome Extension
- Click the [Read&Write Chrome Extension] located on your Extensions bar on the upper right corner of your browser, it should be a purple icon.

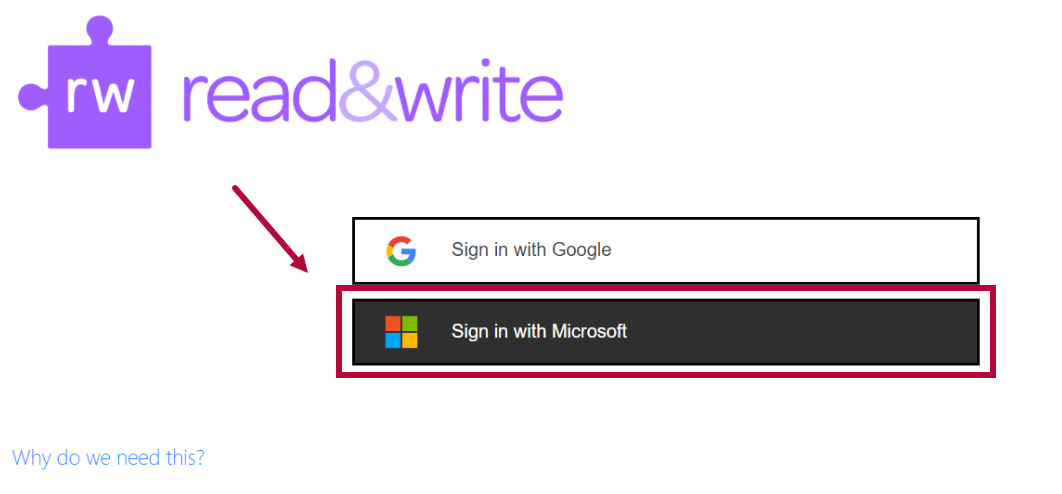
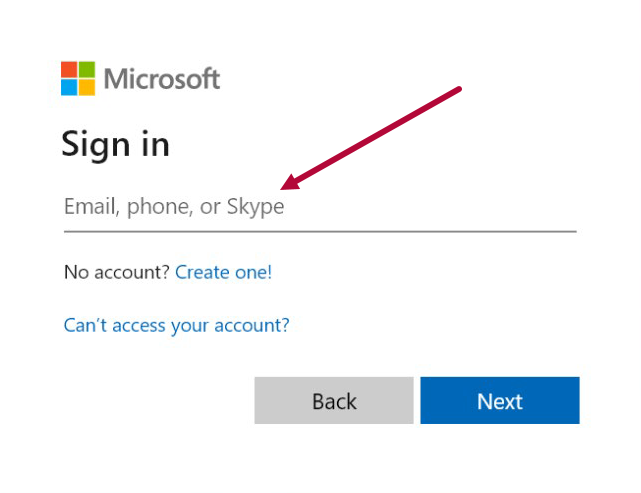
- On the Read&Write sign-in window, click [Sign in with Microsoft].
- Type in your LSC Email Address when prompted, Read&Write will not grant you full access if you use another email address.
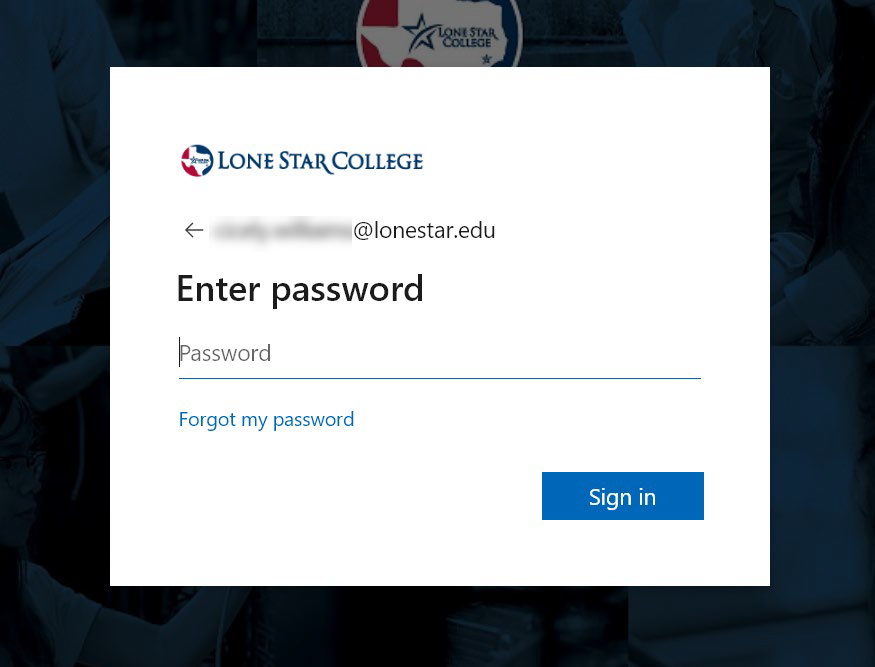
- Type in your myLonestar password when prompted.
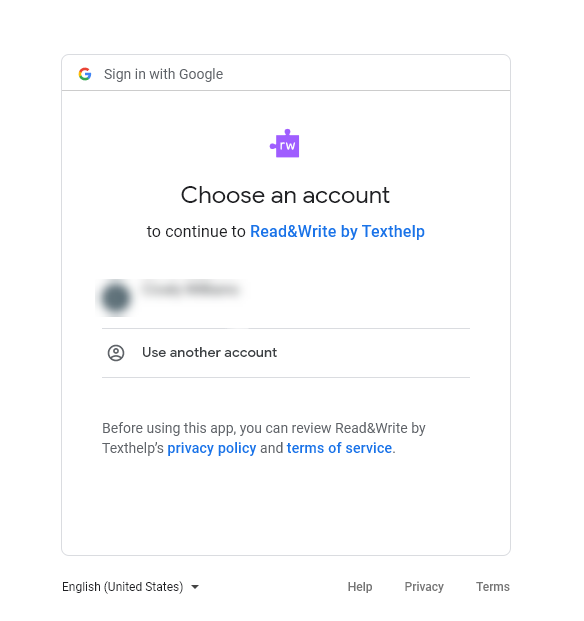
- The next window will be the Google Sign-in option. If you wish to work from your Google documents, log into your Google account here. If not, you can close this box.
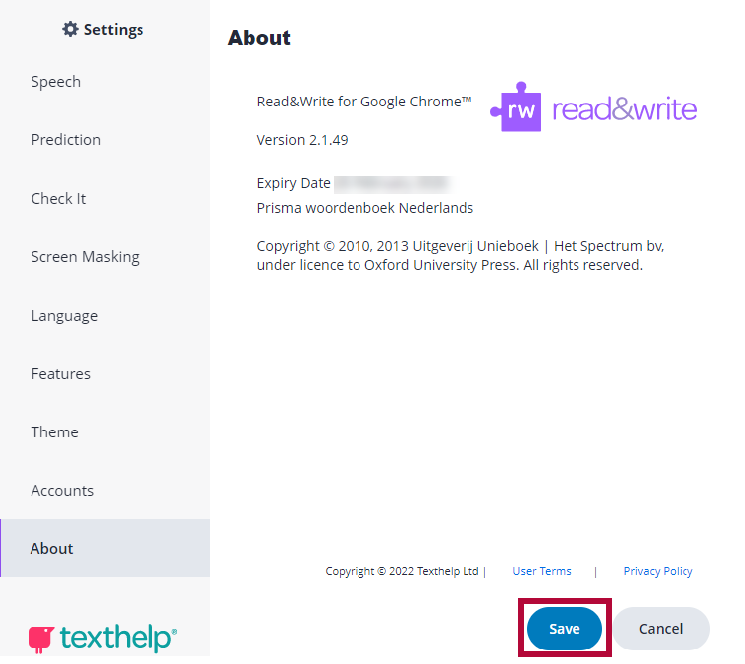
- Click on the [three dots] icon → [Settings].

- From the [Settings] window → [About] → Type in Product Code [G2Q89FXN] → [Activate].
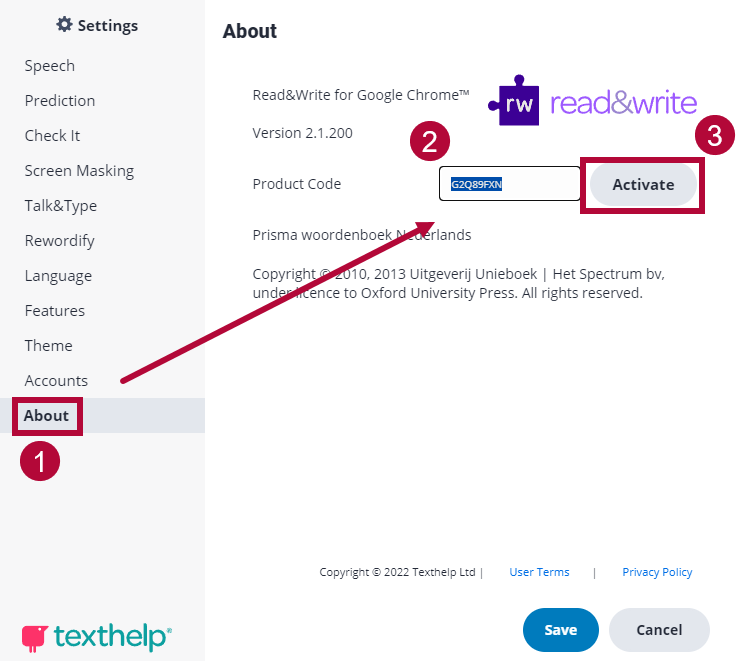
- You have successfully activated Read&Write! You should see the following window when completed. Click [Save] to close the window.