YuJa is the official video platform supported by Lone Star College and integrationed into D2L.
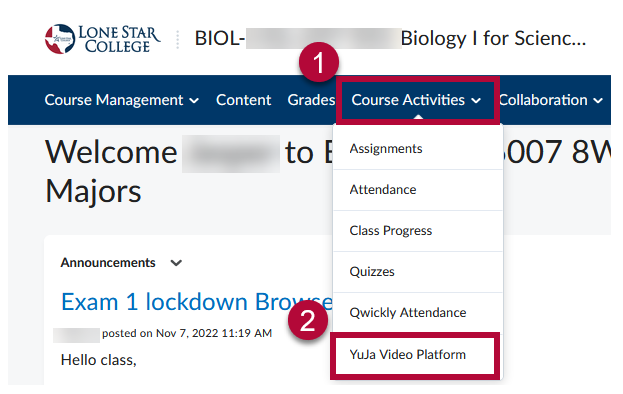
- From your D2L Course, click [Course Activities] -> [YuJa Video Platform].
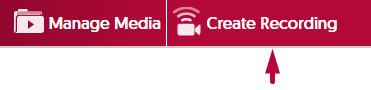
- From the YuJa homepage, Click on Create Recording.
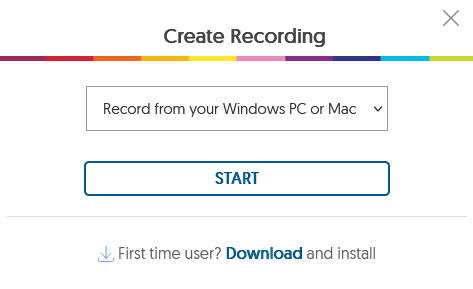
- On the Create Recording window, use the drop-down menu to choose between Record from your Windows PC or Mac, or Record with Browser Capture Studio. Click [Start].
NOTE: You will not be able to Pause during recording while using YuJa Browser Capture Studio, you can only Pause when recording using YuJa Software Capture.
- Select Record from your Windows PC or Mac to launch the YuJa Software Capture window.

- Configure Video, Audio, Screen to preference from the left toolbar. By default, these settings will be set to ON.
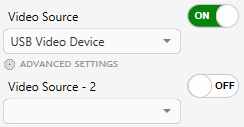
- Video - Configure up to two video sources by clicking the drop-down menu.
Click on Advance Settings to adjust capture resolution and frame rate.
This determines video quality and file size. With great video quality comes great file size.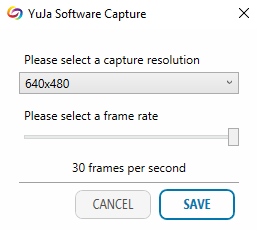
- Audio - Configure up to two microphone sources.
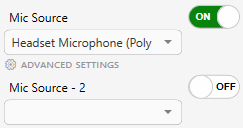
Click on Advance Settings to adjust audio offset if needed. Recommended to leave this at 0.00.
- Screen - Configure the source of where you want YuJa to record.
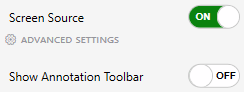
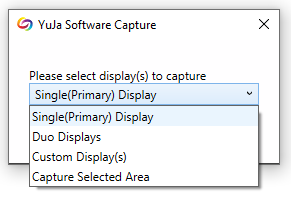
Click on Advance Settings to configure which display to capture, select Capture Selected Area to only capture a specific area of your screen.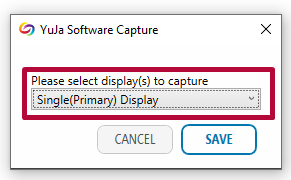
- Video - Configure up to two video sources by clicking the drop-down menu.
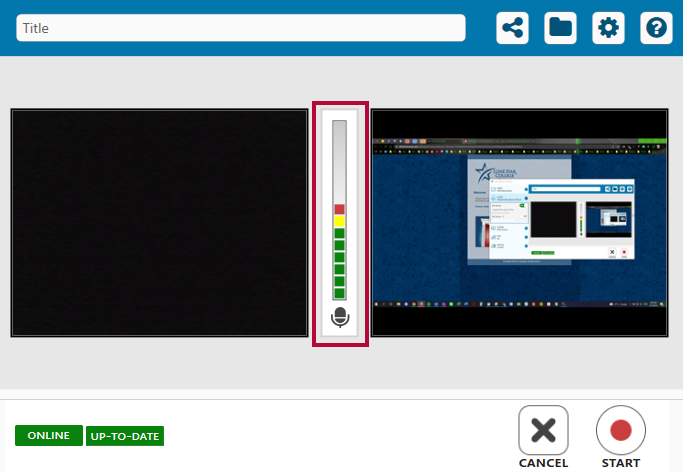
- On the YuJa Software Capture window, verify that the microphone is recording your voice. Speak into your mic and see if colored blocks pop up in the center bar.
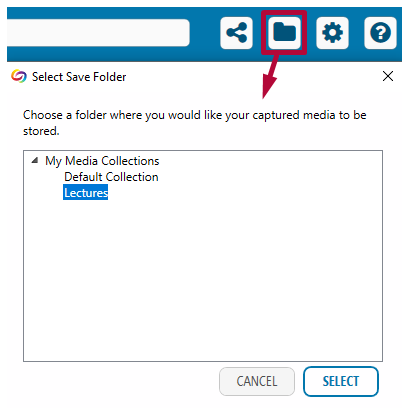
- Select the Folder icon above to configure the location of your recordings within your YuJa Media Library. Please refer to Manage Your YuJa Videos for tips on how to set up folders within your YuJa Media Library.
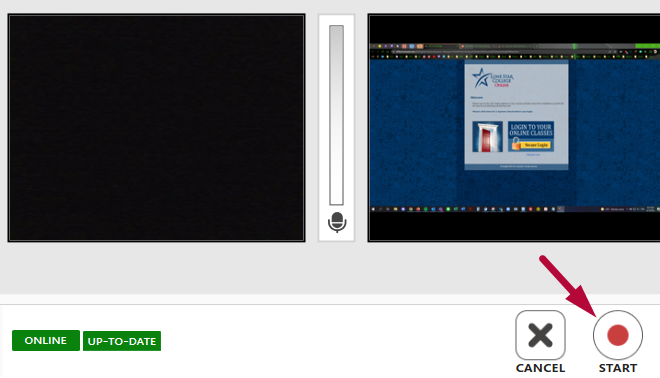
- Hit [Start] to start recording.
- When finished, your video will be saved within the specified folder at your YuJa Media Library.


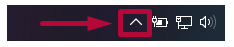
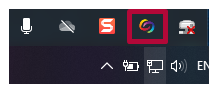
NOTE: At any time, if your YuJa window is nowhere to be found, please check your task bar. You may need to click on Show Hidden Icons to reveal the YuJa icon. Double clicking the YuJa icon will bring back the YuJa Software Capture window.
Additional Resources:
Record with YuJa Browser Capture
Manage Your YuJa Videos
Manual Upload or Download from YuJa